Every kitchen or bathroom owner sooner or later faces the problem of malfunction of a single-handle faucet. Water dripping, stream flowing in the wrong direction, difficulty in temperature regulation, or the handle turns but water pressure doesn’t change – all these symptoms indicate that the faucet needs adjustment. DIY faucet adjustment might seem like a complicated task, but it’s actually an accessible procedure that can be done without calling a plumber. With the right tools and step-by-step instructions, you can quickly adjust a single-handle faucet and restore its normal functionality.
Main Causes of Single-Handle Faucet Malfunction
Before proceeding with faucet adjustment, it’s important to understand what caused its malfunction. Among the most common problems are:
- Limescale and dirt buildup inside the cartridge
- Worn rubber washers and seals
- Incorrect position of the hot water limiter
- Loose faucet lever mounting
- Clogged aerator affecting water flow
Special attention should be paid to the cartridge – it’s the heart of a single-handle faucet. It’s responsible for regulating water flow and temperature. When the cartridge gets clogged or worn out, the faucet starts working incorrectly: it may leak, become hard to turn, or fail to maintain the set temperature. In most cases, cleaning the cartridge from scale is sufficient, but sometimes it needs complete replacement.
Another common problem is incorrect temperature limiter setting. This element protects against accidental hot water activation that could cause burns. If you find it difficult to get sufficiently hot water, the limiter might be set to a too “cold” position.
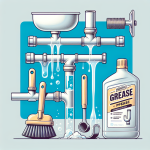
Preparation for Adjustment: Required Tools and Materials
For successful single-handle faucet adjustment, you’ll need a basic set of tools, most of which can be found in every household:
- Allen key (usually 2-3 mm)
- Flat and Phillips screwdrivers
- Adjustable or open-end wrench
- Needle-nose pliers
- Plumbing silicone grease
- Vinegar or special descaling solution
- Soft cloth or sponge
- Spare seals (if needed)
Before starting work, make sure to shut off the water supply – this can be done using the valves under the sink or the main apartment valve. To avoid losing small parts, cover the sink drain with a plug or cloth.
It’s also important to prepare the workspace: clear the area around the faucet and prepare a towel or napkins to wipe up any water remaining in the pipes. For complex faucet models, it’s useful to take photos or make a sketch of the disassembly sequence – this will help during reassembly.
If you plan to replace the cartridge, find out its model in advance and purchase the appropriate spare part. Different manufacturers use different types of cartridges, so it’s important to choose the one that fits your single-handle faucet model.
If you’re dealing with faucet maintenance, you might also find this useful: What is a faucet cartridge in simple terms
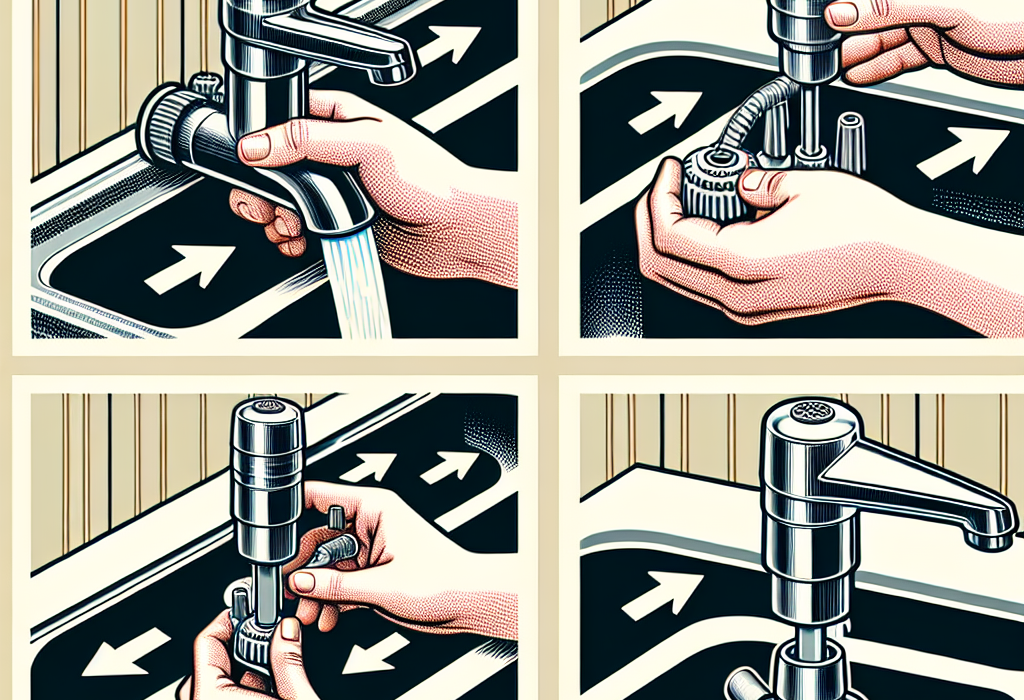
Step-by-Step Process of Single-Lever Mixer Adjustment
Adjusting a single-lever mixer is not such a complicated procedure if done sequentially. Here’s a detailed instruction that will help you handle this task on your own:
- Remove the decorative cap from the mixer handle
- Unscrew the fixing screw using a hex key
- Carefully remove the mixer handle by pulling it upward
- Unscrew the decorative cap or nut covering the cartridge
- Remove the cartridge from the mixer body
After removing the cartridge, inspect it for damage and contamination. If you see scale or other deposits, soak the cartridge in a vinegar solution (1:3 with water) for 2-3 hours. For more serious contamination, you can use special descaling agents.
If you find cracks or wear on rubber seals — it’s better to replace the entire cartridge. If the problem is incorrect water temperature adjustment, pay attention to the temperature limiter — a small plastic ring located on the cartridge.
| Problem | Cause | Solution |
|---|---|---|
| Mixer is dripping | Worn cartridge | Cartridge replacement |
| Handle is difficult to turn | Scale on cartridge | Cleaning in vinegar solution |
| Water not hot enough | Incorrectly set limiter | Adjusting limiter position |
| Weak water pressure | Dirty aerator | Cleaning or replacing aerator |
After cleaning or replacing the cartridge, reassemble the mixer in reverse order. Make sure all parts are properly positioned and securely fixed. Turn on the water supply and check the mixer operation — the handle should turn easily, and water should have stable pressure and temperature.
Maintenance and Care Tips to Extend Mixer Lifespan
For your single-lever mixer to serve longer and require less frequent repairs, follow these simple preventive rules:
- Regularly clean the aerator from scale (every 3-4 months)
- Don’t leave the mixer in extreme “hot” position for long periods
- Use mild cleaning agents without abrasive particles
- After use, wipe the mixer dry with a soft cloth
- When leaving for a long time, shut off the water supply
Pay special attention to your home’s water quality. If it contains many minerals and is hard, consider installing filters or water softeners. This will significantly reduce scale formation not only in mixers but also in other plumbing fixtures.
For daily care, avoid using aggressive chemicals and abrasive sponges that can damage the mixer’s coating. Instead, choose special products for plumbing care or simply use soapy water.
Don’t ignore minor problems — if the mixer starts dripping or the handle becomes harder to turn, it’s better to adjust it immediately rather than wait for a serious breakdown.
Conclusion
Adjusting a single-lever mixer is quite a feasible task for any homeowner. With a basic set of tools and following our instructions, you can quickly restore your mixer’s normal functionality without calling a specialist. Regular care and timely maintenance will significantly extend your plumbing’s service life and save money on repairs. Remember that it’s easier to prevent a problem than to solve it later. And if you encounter a malfunction you can’t fix yourself — it’s better to contact a specialist than risk damaging the mixer completely.